How to Make Recycled Crayons Using Silicone Molds
Inspire Artists’ Big Little Universe
Making homemade crayons is a fun and inexpensive DIY activity. It also helps to develop fine motor skills, teaches shapes and colors, and fosters imaginative play. Whether you’re looking for a rainy day activity or want to make the perfect party favor, it’s easy to recycle broken crayons and turn them into new ones. Let’s make new crayons and keep the old!
Use all of the crayons in the box. Even the broken ones! Before you toss out broken and forgotten crayons, color your little artist’s world with this fun, easy and child friendly DIY crayon project. Follow these simple steps to transform old or unused crayons into fun new shapes and colors.
Materials Needed:
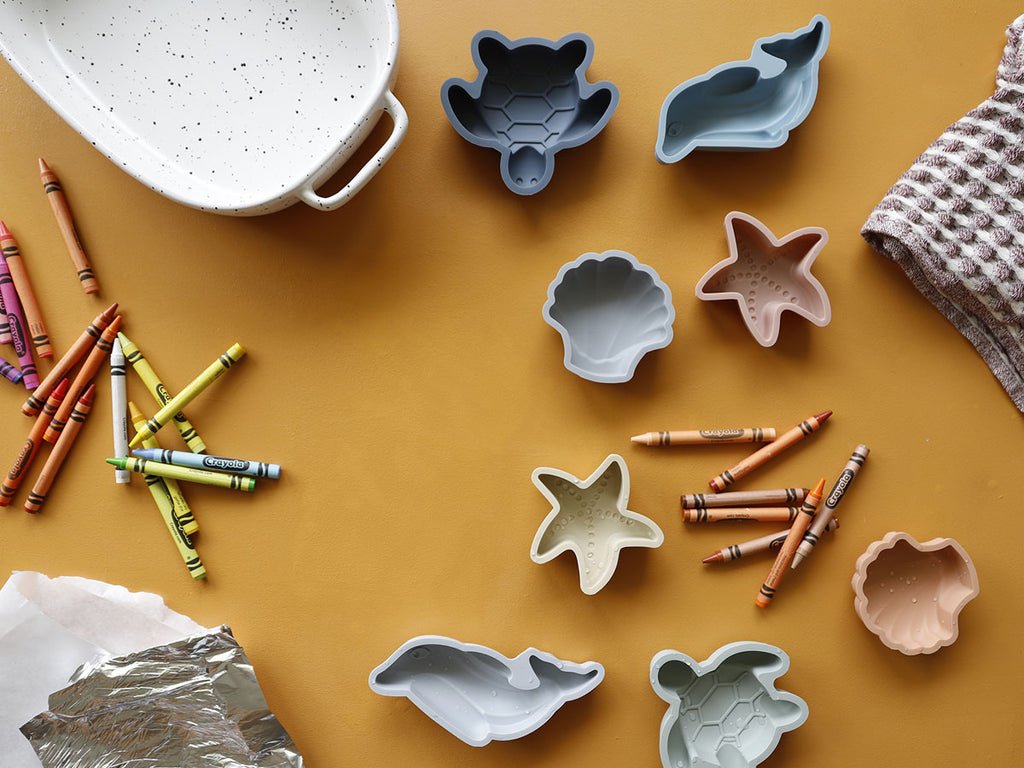
Oven-safe silicone molds (try our sea creature-inspired shapes)
Wax crayons in a variety of colors. (We used Crayola crayons.)
Parchment Paper or Aluminum Foil
Step 1: Fill a bowl with warm water, gather new or broken pieces, and soak for one minute to remove paper or peel without soaking.
Tip: Create a colorful “teachable moment”! As you sort through the pieces, name the color of each crayon and encourage your little one to imitate you.
Step 2: Drain the bowl and remove the wrappers.
Tip: Let kiddos practice using their pincer grasp as they peel the wrapper. This will help to improve fine motor skills.
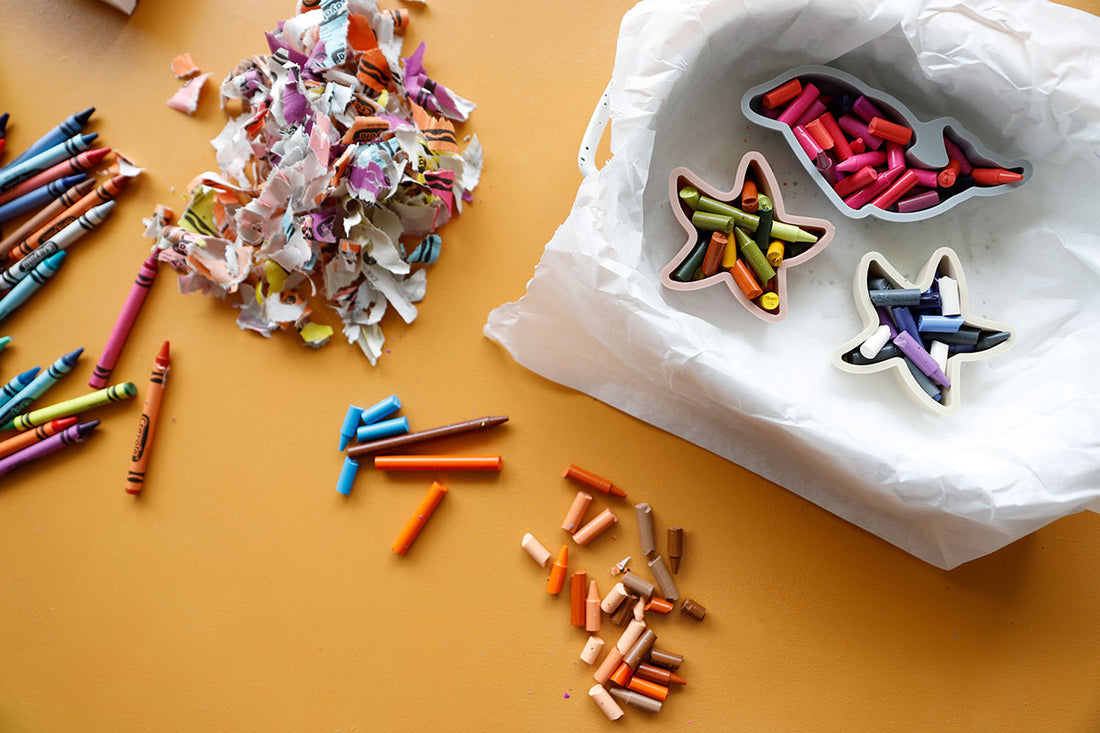
Step 3: Sort and fill an oven-safe mold with broken pieces.
Tip: Get creative and encourage little ones to create their own color combination. When it comes to making recycled crayons, the sky's the limit for creativity!
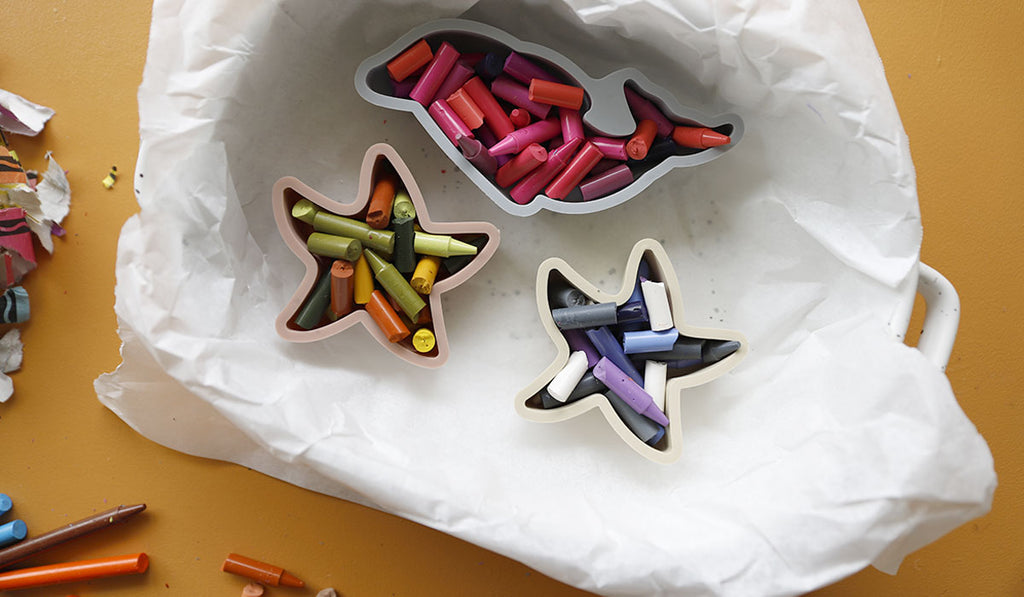
Step 4: Preheat the oven to 200 degrees F, fill each mold to be flat at the top with crayon pieces and bake for 48 - 50 minutes. Add the 2 extra minutes only if wax has not fully melted.
Tip: Fun shapes like our silicone seashell, starfish, turtle and dolphin molds make it more fun! Use imaginative play to describe shapes.
Step 5: Once melted, place the molds in the refrigerator for 10 minutes or until hardened.
Tip: After setting the timer, encourage little ones to clean the space with a clean-up song. This will make it more fun and help to pass the time as you wait until crayons are ready to use.
Step 6: Once crayons have cooled, gently remove crayons from the mold by gently pulling the edges of the molds outwards away from the crayon.
Tip: A silicone mold makes it easier to pop crayons from mold. Simply pull the edges of the silicone molds outwards, away from the crayons.

Step 7: Wash molds with hot water and gently scrub any pigments away. Let the coloring adventures begin!
Tip: Try out the new crayons with our free printables. They’re the perfect inspiration for little artists.
Step 8: After coloring, store crayons and art supplies.
Tip: Our right-sized tote is the perfect place for little artists to store all of their crafty creations.
How to Make Crayons at Home
If you're a parent or a grandparent, chances are, you have plenty of art supplies on hand. But what about the broken crayons? Are they collecting dust or tossed into a forgotten bucket? Before you throw them out, breathe new life into old or worn down crayons with this easy, tot-friendly project. Prep then sit back while they bake, you’ll have colorful, repurposed crayons to delight and inspire your little ones. Here's how to get started!